


Angular Material provides two sets of components designed to add collapsible side content (often navigation, though it can be any content) alongside some primary content. These are the sidenav and drawer components.
The sidenav components are designed to add side content to a fullscreen app. To set up a sidenav we use three components: <mat-sidenav-container> which acts as a structural container for our content and sidenav, <mat-sidenav-content> which represents the main content, and <mat-sidenav> which represents the added side content.
In my experience using Angular Material sidenav, it was the most easiest experience to create a list on the side that can collapse without doing much work or css magic.
Summary
Did you know that you can use two sidenavs in Angular Material? It is possible, and surprisingly straight forward, no tricks needed.
If you are looking for the short version, simply put the inner sidenav inside the content of the outer sidenav.
Still confused? let's take a deeper look.
Installation
If you haven't done so already, let's add Angular Material to your project
The quickest way is to add it through angular schematics. In the directory of your project execute:
ng add @angular/material
The ng add command will additionally perform the following configurations:
- Add project dependencies to package.json
- Add the Roboto font to your index.html
- Add the Material Design icon font to your index.html
- Add a few global CSS styles to:
- Remove margins from body
- Set height: 100% on html and body
- Set Roboto as the default application font
Import Sidenav Module
As part of the setup, we need to import the sidenav module to our project in order to use it. We can do so in the App Module, or you can import it in a specific module if you are using it their only.
In the top of the module file import the module.
import {MatSidenavModule} from '@angular/material/sidenav';
and then in the imports array
imports: [
...
MatSidenavModule,
...
]
Now we are ready to use the sidenav tags in our components.
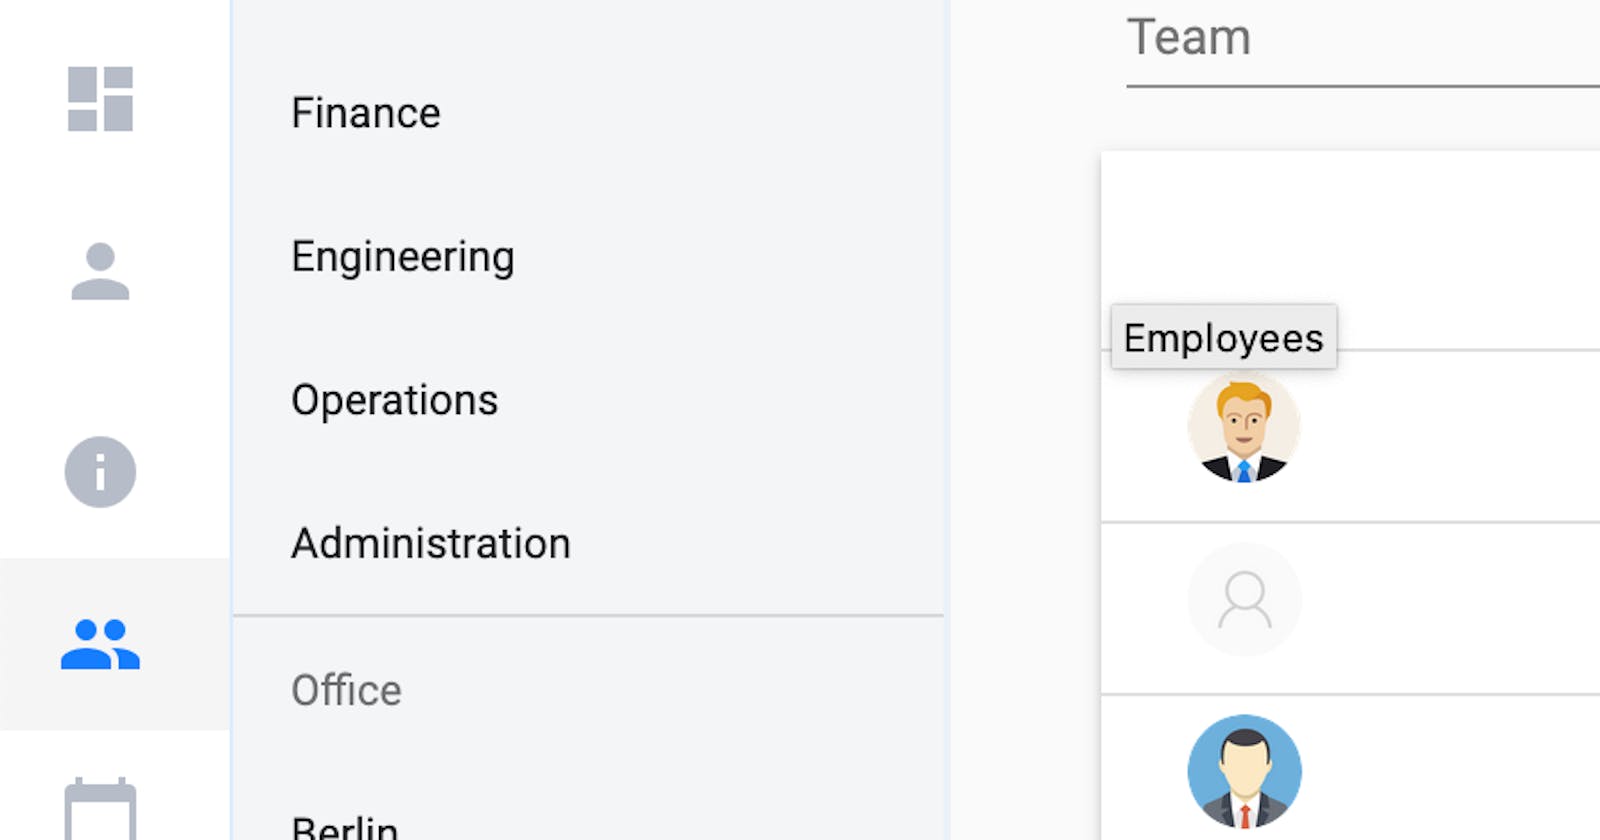
How it looks
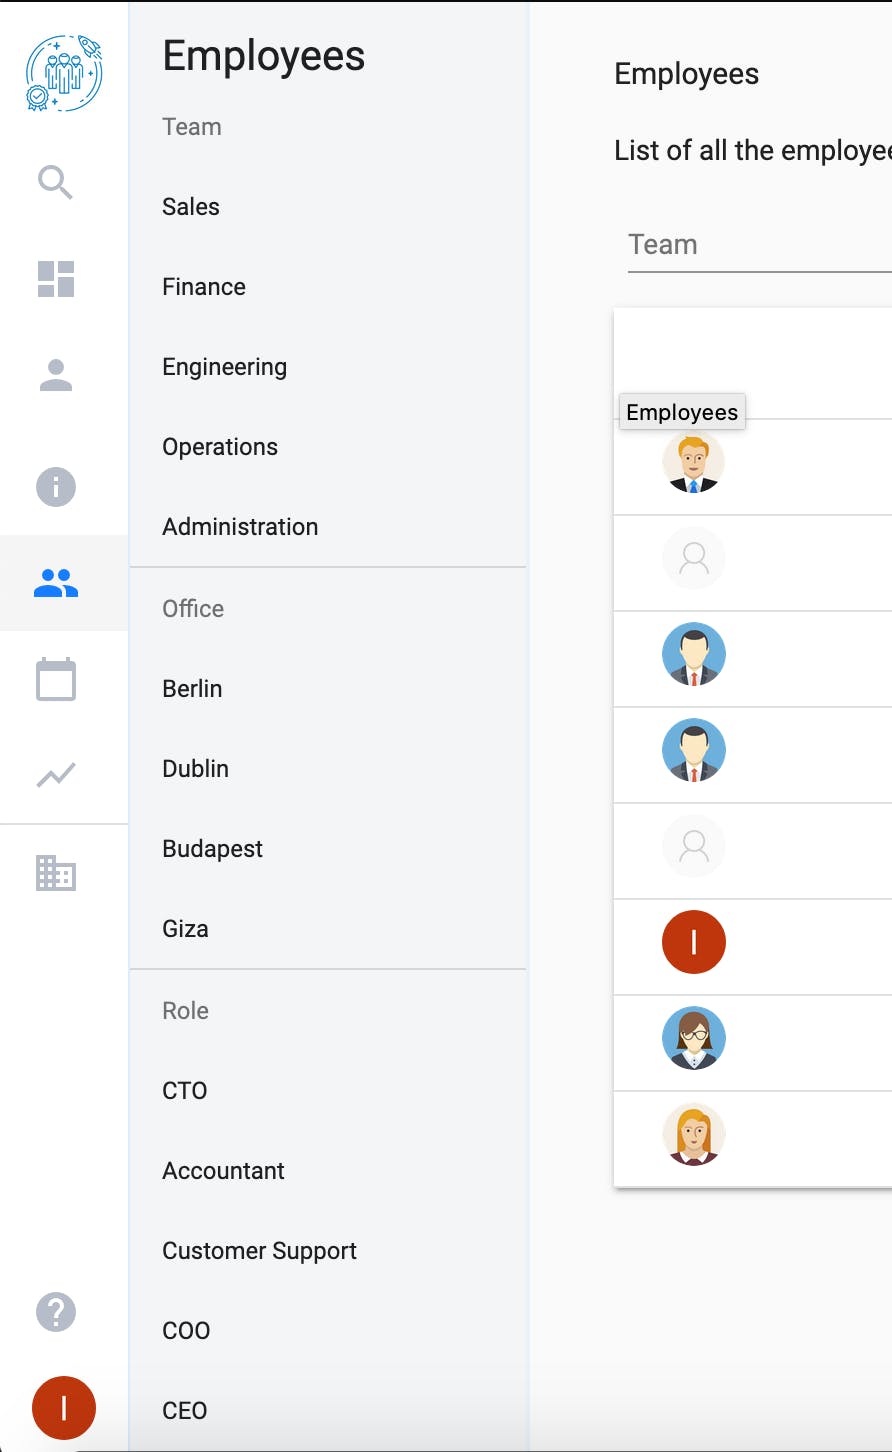
In the image above, there is two sidenavs, one on the very left, that has the icons, and the inner one -with the gray background- is right next to it, actually, to be accurate, it's inside the content of the outer the sidenav, what does that mean? enough talking, let's code.
Give me some code
Here is the the example from the Angular Material Docs:
<mat-sidenav-container class="example-container">
  <mat-sidenav mode="side" opened>Sidenav content</mat-sidenav>
  <mat-sidenav-content>Main content</mat-sidenav-content>
</mat-sidenav-container>
In the code above, there is only one sidenav, with only Main content written inside the mat-sidenav-content, this where we can insert the inner sidenav. for the sake of this example, I will just copy the same code again and put it inside the code above.
<!-- outer sidenav -->
<mat-sidenav-container class="example-container">
    <mat-sidenav mode="side" opened>Sidenav content</mat-sidenav>
    <mat-sidenav-content>
        <!-- inner sidenav -->
        <mat-sidenav-container class="example-container">
            <mat-sidenav mode="side" opened>Sidenav content</mat-sidenav>
            <mat-sidenav-content>Main content</mat-sidenav-content>
        </mat-sidenav-container>
    </mat-sidenav-content>
</mat-sidenav-container>
Using sidenav with Angular router
In real-life scenario you probably want to only show an inner sidenav in some page based on the router, easy, same concept as before, except now the inner sidenav will be in a different component, that only renders when users visit a certain route.
Let's write some code. I will start with the outer sidenav, let's do that in app.component.html and insert the router-outlet inside it's content, to allow the router to render other components there.
<!-- outer sidenav -->
<mat-sidenav-container class="example-container">
    <mat-sidenav mode="side" opened>Sidenav content</mat-sidenav>
    <mat-sidenav-content>
        <!-- angular router's rendering area -->
        <router-outlet></router-outlet>
    </mat-sidenav-content>
</mat-sidenav-container>
The main part is ready, now we need to have another component that renders the inner sidebar, let's imagine the other component template is called other.component.html, we would just add another -innder- sidenav:
<!-- inner sidenav -->
<mat-sidenav-container class="example-container">
    <mat-sidenav mode="side" opened>Sidenav content</mat-sidenav>
    <mat-sidenav-content>
        <h1>I am the inner sidenav's content!</h2>
    </mat-sidenav-content>
</mat-sidenav-container>
Last step is to configure the router to render the other component on a certain route, and done.
easy !